How to Caulk Around a Tub
Take aim at old, cruddy caulk, and give your tub a fresh new seal
- 1 hour
- Skill Level Easy to moderate Just do the job neatly and carefully for long-lasting success
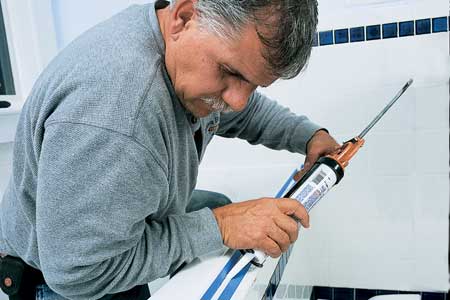
You've seen the ominous signs of aging caulk. First
it was the brown tinge along the edges. Now its smooth and supple skin
has turned brittle and cracked, opening the way for stubborn colonies of
mildew to take hold, or for water to seep through and turn wallboard
and framing mushy. Whether it's around your sink, between a tub and its
tile surround, or covering the joints of your shower stall - it has got
to go.
Fortunately, caulk is cheap, and applying it isn't difficult. All you need is an hour, a few common tools, and materials easily found at any hardware store. But as easy as it is, you still have to do it right, or you'll be caulking again next year, says This Old House general contractor Tom Silva. "The key is to completely remove the old caulk, including the residue you can’t see," he says. "You've got to start fresh with a clean, smooth, dry surface."
Follow Tom's steps on the next page, and "you should get five to ten years out of that seal, easy," he says.
Tools for This Project
-

5-in-1 Tool or
Utility Knife -

Caulking Gun
Supplies You Will Need
2. Cotton Rag
3. Painter's Tape
4. Caulk
Overview
Caulking Points
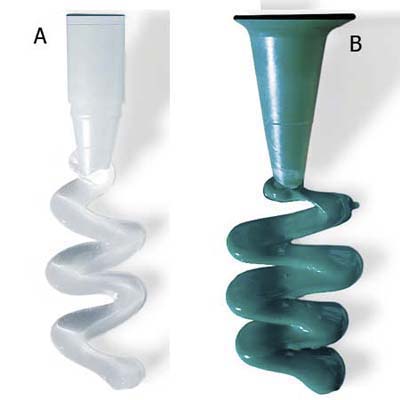
The best caulks for tubs, sinks, or shower stalls come in tubes labeled “Tub and Tile” or “Kitchen and Bath.” These are either acrylic latex or silicone compounds that have been chemically tweaked to resist mildew and to stick to smooth, nonporous surfaces. But they have distinctly different personalities.
(A) Silicone: Tenacious, waterproof, and very flexible, this type of caulk is also finicky about surface conditions, difficult to smooth, requires mineral spirits for cleanup, and emits a nose-wrinkling odor until cured. It leaves a residue that’s hard for anything - including new silicone - to stick to. That’s why formerly siliconed surfaces should be scrubbed with an abrasive pad soaked in mineral spirits. Silicone caulk has a color palette limited to clear, white, and almond.
(B) Acrylic Latex: Compared with silicone, this kind of caulk is much more forgiving about the type and cleanliness of a surface it’s applied to. Smoothing it is easy, it cleans up with water, and it doesn’t have much if any smell. While it does shrink more and dry harder than silicone - and will probably need to be replaced a little sooner - the replacement job should go faster. Acrylic latex caulk comes in a rainbow assortment of colors to match sink and tub glazes.
Step by Step
-

Remove Existing Caulk
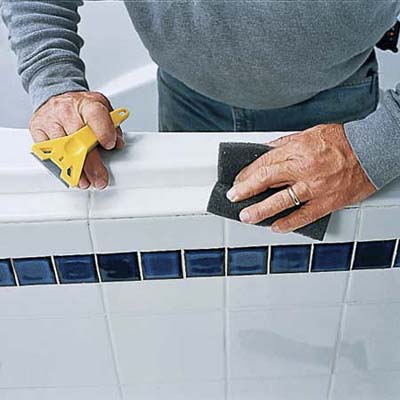
For this job, Tom sliced away the old acrylic latex caulk with quick, sharp strokes of a 5-in-1 painter's tool and a razor scraper. You can also use a utility knife. (Note: Metal blades can scratch plastic sinks, tubs, and surrounds; use a plastic razor blade instead. Caulk removers also harm plastic.) -
Scrub
A dry, nonabrasive pad scours away every trace of caulk residue. (Clean up after silicone with a pad soaked in mineral spirits. But to avoid scratching plastic fixtures, use a soft rag dampened with mineral spirits, not a scouring pad.) Wipe a damp cotton rag over the joint to remove the caulk dust and prepare the surface for the new caulk. Thoroughly dry the area with paper towels, a dry rag, or a hair dryer. -
Tape and Caulk
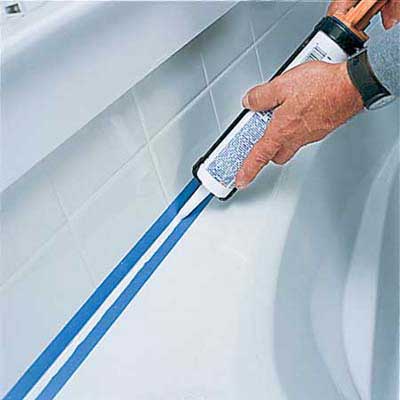
Lay parallel strips of blue painter’s tape, about 3⁄8 inch apart, to keep the bead straight, uniform, and off surfaces where it shouldn’t be.
Point the nozzle hole toward the joint; hold the gun equidistant from the surfaces on either side of the joint and about 45 degrees out from it. Then apply steady pressure to the trigger as you move the gun smoothly along the entire length of the seam. Whether you push or pull the gun is a matter of personal preference. Either way, keep the caulk gun moving at a steady speed matched to the rate that caulk is flowing out of the nozzle. Too fast, and the bead will be too thin, with bubbles or breaks in the seal; too slow, and you’ll waste material and spend more time cleaning up.
Tip: Trim the nozzle at a 45-degree angle near the tip. The hole in the nozzle should be just big enough to fill the joint, roughly 3⁄16 inch. -
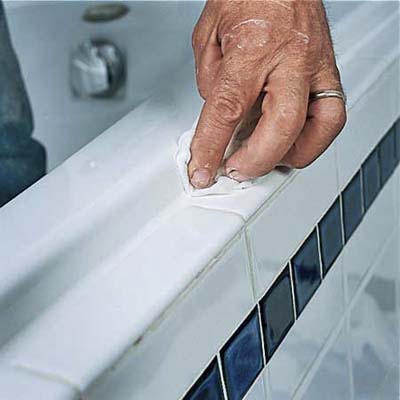
Smooth
As soon as the seams are filled, dampen a lint-free rag or paper towel and press it into the joint with your finger. Pull it along the joint in one continuous motion to shape the fresh caulk into a concave bead. Immediately remove the tape, one strip at a time, taking care not to let it touch any of the fresh caulk. Then go back and smooth the bead again to eliminate the tiny ridges left by the tape. Wait at least 24 hours for the caulk to cure before using the shower or bath.

No comments:
Post a Comment